

To translate InDesign files quickly and efficiently, you need more than just a basic knowledge of translation tools. Whether you’re working on a brochure, presentation or worksheet, a structured workflow is crucial to manage complex layouts and preserve design elements across languages.
Localizing InDesign documents requires both language expertise and design awareness. Beyond just translating words from one language to another, you need to make sure those translations look good and function well in existing designs. Poor formatting or layout can make accurately translated documents appear unprofessional or confusing.
A thoughtful approach, combining preparation, the right tools and collaboration between designers, translators and marketing teams, streamlines the process and minimizes costly errors.
When would you need to translate InDesign files?
As a marketer, you’ve probably come across an InDesign file. You’ll know if they are if the file name ends in .INDD (InDesign Document) or .IDML (InDesign Markup Language).
Common file types made in InDesign include:
- Brochures
- Flyers
- Event goods like invitations and posters
- eBooks
- Spec sheets
- Newsletters
- Presentations
And as a global marketer, you may wonder how to translate it, as it may not seem as straightforward as translating a simple text document.
Translating an InDesign document isn’t like just translating text, it’s more like translating a website. One of the critical focuses of InDesign is (surprise!) design. When translating, you need to consider not only the words themselves, but also how the translated words and text fit into the document’s layout.

Why speed and accuracy matter in InDesign translation
Many people approach translating InDesign files the same way they approach translating any other kind of document: they copy and paste all the text in the document into a Word or Excel file, send that document to a translator, copy and paste the translated text back into the original InDesign document, and go back through each page to fix any formatting issues.
Not only is this process extremely tedious and time-intensive, but you’ll likely have a lot of errors in your finished product.
Here are just a few of the errors that can occur when using this method:
- Formatting issues, including broken text boxes and incorrect text flow.
- Layout disruptions, including misaligned images and text wrap issues.
- Content errors like broken hyperlinks and improperly inserted text.
- Language errors, like right-to-left (RTL) languages displaying incorrectly.
- Workflow inefficiencies, like version control problems and a lack of translation memory (TM) integration.
Beyond the already-inefficient nature of this translation technique, these types of mistakes can be extremely costly to your company, especially if you’re expanding into a new market.
Finally, this tactic greatly reduces the speed and accuracy you can translate. With your already-tight deadlines, this can create workflow bottlenecks, damage your brand integrity, and confuse or mislead your audience.
See also: How to set up a design workflow for global social media accounts
Workflow optimization: Streamline your InDesign localization process

To translate InDesign files quickly and well, your team needs to have a consistent workflow in place.
While there are translators specialized in working with InDesign, setting up an internal InDesign workflow allows you to:
Design with translation in mind
There are a variety of ways you can make your InDesign files translation-ready. When designing a document, if you know that the file is going to be translated in the future, you or your designers can implement the following guidelines to make the process smoother and simpler, particularly when working with specialized InDesign translation software:
- Leave some white space at the end of each text box, particularly if your design is being translated from English to another language (English tends to be shorter than many other languages on the page).
- Insert column breaks that force text to start at the top of the next column in the text frame, to prevent the ends of longer texts from being accidentally hidden.
- Use soft returns whenever possible instead of hard returns, particularly in the middle of sentences.
- Maintain consistent character and paragraph styles throughout the document.
- Pick fonts you know have all the appropriate diacritic marks in your target languages.
- Avoid inline text styles if possible, like bolding or underlining specific words, particularly if your document has a lot of text.
- Use single-language layouts, rather than multi-language layouts, to avoid manual translation copy and pasting.
- Make sure all the text is editable—for example, no pieces of text are placed as images. Any text appearing in images must be localized and edited separately.
- If you have multiple text boxes that form a single sentence or paragraph, “thread” them together so that programs recognize them as one unified text element.
- Use Lists, Paragraph Styles, and Special Characters functions to align lines of text, rather than tabs and spaces.
- Use the native InDesign Tables tool instead of individual text frames and manually drawn lines to create tables.
In addition, ensure your design is as finalized as possible before you start translating. This can help avoid confusing or repetitive future edits. You should only want to edit your document’s “base” design, not get lost in all the different language variations. This could lead to costly revisions or mistakes down the road.
Export your work correctly
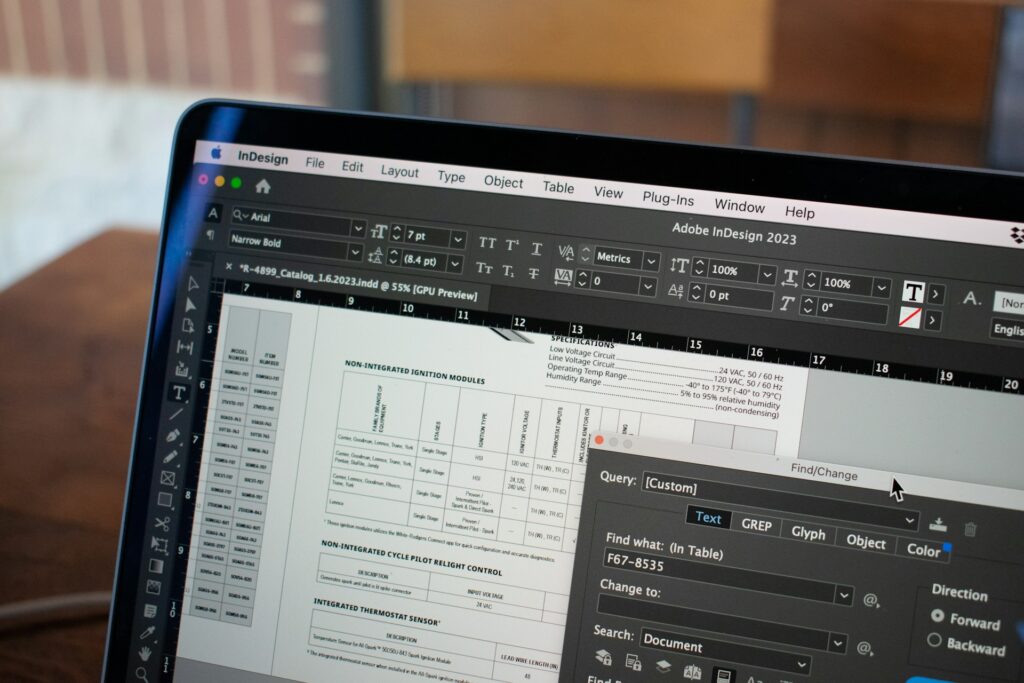
Once you’ve got a (mostly) finished design, it’s also extremely important to export it as the proper file type. InDesign files are typically automatically saved as .INDD files, but should be exported as .IDML files when translating.
Why? .IDML files are essentially the XML representation of an InDesign file, and the file type was specifically designed for translating InDesign documents. Most translation software only accepts this file format.
To export your files as .IDML files, just follow these steps:
- Open the document you want to export
- Click Save As or Export under the File menu
- In the “Save as Type” (on Windows) or “Format” (on Mac) dropdown menu, select InDesign Markup (IDML).
- Click the save button
Pre-translate your documents
While we wouldn’t recommend using online programs like Google Translate to translate your documents completely, some professional translation tools can help save you time and money with their intelligent translation features. We’ll dive into specific programs we recommend in the next section.
Some programs can help you create a translation memory (TM) or integrate with any TMs you already have. A TM is a database that stores words or phrases that your company has previously translated. Some programs can scan your .IDML document and automatically translate any words or phrases that match your TM.
See also: ChatGPT vs. machine translation tools
Use a human translator, and brief them properly
We always recommend working with a human translator as much as possible. InDesign documents, with large amounts of critical text, are typically important for your company. Even InDesign-optimized translation programs with machine learning can (and will) make mistakes, especially with idioms, slang, and other cultural references.
When briefing your translator, in addition to the usual information expected in a translation brief, make sure to include specific instructions for any design-related concerns. For example, having them flag any sections where text doesn’t fit post-translation, or letting them know if a font substitution is allowed or needed.
You may also want to ask your translator, particularly if they are from the target country or region, to take a look at all of the photos in the document and check that they’re culturally appropriate for the market.
Keep your designer on hand
There will almost always be some design cleanup required after a document is translated. As it’s rare to find a translator who is also an experienced graphic designer, keep in mind that you or your design team will probably have to make some edits before a document is completely finalized. This is especially true if you’re translating from a left-to-right to a right-to-left language (like Arabic) or vice versa.
See also: Multilingual graphic design: Why it pays to hire specialists
Tools to translate InDesign files quickly and accurately
While there aren’t many InDesign-specific translation programs out there, the best ones can greatly improve the translation process for you and your translators.
- SDL Trados: Trados is the industry-standard translation software, highly recommended by many translators. It offers an InDesign preview in-app, allowing translators to see in real-time how their translations affect the look of a document and proactively address any formatting issues that arise.
- Redokun: Redokun is a TMS specifically designed for translating marketing materials like technical documents, brochures and e-learning content that require frequent updates. It offers machine learning translation, TM integration, and has a collaborative platform with a user-friendly layout that updates all versions of a document as design or content changes are made to the original version.
- Pairaphrase: Another TMS built with InDesign in mind, Pairaphrase is a collaborative software that can encode InDesign files to best preserve their layout and formatting. All files and data on the platform are completely encrypted, and its AI tools can help your translation team create translations that fit into tight text boxes.
- Smartling InDesign Plugin: Among all of Smartling’s features, one of its most useful is its InDesign plugin. It allows you to send content directly from InDesign to the Smartling platform. You can also preview how translated copy will look directly in InDesign, and accept and apply those translations.
Ensure a seamless workflow with multilingual graphic design
Smooth multimedia localization requires an efficient workflow. With various processes involved, from text translation to design file updates, image adaptation and file exporting, there’s a lot to consider when translating InDesign files.
It’s best to get help from professionals who are experienced with the tools required and the know-how when it comes to best translation and localization practices. We’d love to help! Get in touch with our team to find out if you qualify for a Free Content Consultation.